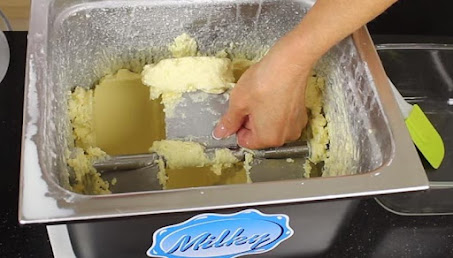
Even a tiny amount of butter can make any dish much tastier. That’s why in French cuisine it is used literally in every recipe. Usually, a store-bought dairy is rarely high quality. So it’s a good idea to try to make butter at home. Especially since this is a very simple thing to do. Everything you need for it is heavy whipping cream and something to whip it.
There are two ways of making butter: you can use a mixer (or blender) or a butter churn. Both options are good, but using a butter churn you wouldn’t need to worry about separating butter from the buttermilk. Also, an electric churn makes the whole process so effortless that you will fall in love with making butter at home.
Making Butter with a Churn
A butter churn usually has a buttermilk outlet. So all you need to do is to:
- Pour whipping cream into the churn. The manufacturer will declare the minimum and maximum amount of cream that can be processed in the machine.
- If you use an electric butter churn, turn it on and let it work for about 20 minutes. Again, the manufacturer will declare how much time is needed. If your butter churn is manual, you will need to work with it for 20-30 minutes.
And that’s it. The process of making butter at home is unbelievably easy, especially with the use of a butter churn. This machine also provides a better output from the cream than a mixer or a blender.
To make your butter taste better you can add just a dash of salt to it or any other ingredients like herbs, garlic, or even chocolate.
Making butter with a mixer or a blender
It’s preferable to use a blender since it makes the process less messy – you can just put the lid on so all splatters will stay inside.
- First, pour whipping cream into a blender or a bowl if you use a mixer. Turn your blender (or mixer) on medium-high and wait until the cream becomes whipped cream.
- Continue churning it and you will see how it gets thicker and the buttermilk separates from the cream. It means that you are on your way to a homemade butter!
- Then the mixture will become more liquid and will swirl around the blades. At this moment the butterfat and the buttermilk are completely separated.
- Now carefully pour out the buttermilk. Try to pour out as much of it as possible.
- Prepare a bowl with cold or even ice water.
- Scrape the butter there and start squeezing and kneading it to get rid of the leftover buttermilk.
- Continue doing it and changing the water occasionally until the water remains clean.
- Dry the chunk of butter with a towel.
Congratulations! You’ve made butter. Again, you can salt it or add some other spices or ingredients to it.

No comments:
Post a Comment